Saturday, July 10, 2021

What's a Pumpkin Honeypot and why you should probably be using a VPN when you're on free Wi-Fi

So to start off I repurposed the first honeypot I had created a couple of months ago.
This was quite similar to flashing the microSD the first time so I won't go into the details again. You can read more about Kali for Raspberry PI here. This is really cool because once you flash the Kali image onto the SSD with the addition of a battery pack you have now created a portable Kali machine that is ready to take with you on all sorts of adventures. Please remember to only test on things that you have permission to do so. An easy way is to just test against your own devices and I will show a few examples below of some fun things I found going a little deeper into my security research on Wi-Fi. So in the first honeypot I created before I had simple logging capabilities if a rogue device where to connect to my access point. I had at least a mac address and minimal information about the device. So that was interesting but I wanted to go a bit further and see what else you could do. I decided for this next example to not try and reinvent the wheel but rather to see what are some cool tools I could find to help me further understand how this whole Wi-Fi thing works more in depth. There are many tools to explore still but I found this one in particular to be very interesting. It is called WiFiPumpkin3 and you can take a look by grabbing a free copy over on github. They have done away with the graphical user interface which has given way to the command line based version. This makes its use slightly more technical but does allow for more granular control, automation and custom configurations.


And to start off you can name your WiFi any emoji you want which is fun. So now that I connected to the newly created access point nothing really seems off. I went and visited my website at jasongardner.us and started clicking around. Great, we were able to spin up a new wifi access point with the raspberry pi in a minute once wifipumpkin3 was loaded on the Raspberry Pi. However, that's not all that just happened. 


So within wifipumpkin3 there is 'sniffkin' which is sniffing the traffic flowing through the honeypot. Here the rogue access point we have created is now allowing devices to connect and browse the web but we are also logging what websites and IP addresses the device is connecting to. That's probably not what you expected when you were just connecting to a free Wi-Fi now is it. Here is another module within wifipumpkin3 that I thought was very interesting. Here this is creating a captive portal so when a device connects to the rogue access point users are greeted with a portal requesting a username and password. You may have seen this on a campus, hotel or even at a Starbucks. The danger here is that this page can be made to look like any login portal anywhere. So when users connect and enter their usernames and passwords then they are not putting those where they think they are. 


So here you see that the user has successfully logged into the captive portal on their iPhone. They have unwittingly entered their credentials on a fake login page to use the free Wi-Fi. 


As you can see this is just an example and the user 'Admin' with a a password of 'test' is logged in the system. Now the user will connect and not only have the credentials they use to access the local free wifi were logged then any subsequent internet browsing will be logged as well. Well, why am I telling you this? This all seems a bit troubling and makes me think that I shouldn't use free Wi-Fi anymore anywhere. I'm saying that more so that you can be aware of what's out there. I think that by being aware, you can take the proper steps to protect yourself and safeguard your usage of the internet and keep some of your privacy intact from attackers. Sometimes you have to think like an attacker to protect yourself from an attacker. So what can you do? Should you really just leave your phone off the next time you're at the airport or at a hotel? Of course not. Just use a VPN. A VPN will create a tunnel of sorts for your data to travel across the internet safely, securely and privately. All someone would be able to see even if they are sitting right there in the middle of your connection would be scrambled messages and that perhaps you are connecting to a VPN. I decided to investigate this a bit further to see how encrypted or protected my internet usage was with a VPN. Here I am using NordVPN on an iPhone. 

You can grab the latest version of Wireshark here. Wireshark allows you to analyze and look at network traffic. Here we are looking at the interface wlan0 which is the Wi-Fi interface where the rogue access point is broadcasting from. By looking at interface wlan0 we are able to see everything going to and from the iPhone and the honeypot. One unexpected thing I found here is that although most of my internet traffic was being routed through the VPN and was therefore encrypted not all app data was going through the VPN tunnel. In fact an observer could see that I'm also listening to music on Spotify. However, at least the important internet traffic like emails and banking are protected which is good. So although the VPN may not work 100% correctly all the time, you are getting an infinitely greater amount of privacy by using the VPN when traveling or visiting new places that you are unfamiliar with where there could be a rogue access point. Again, though to clarify you should not do this against devices you do not own or have the permission to test against. I am showing you this more as a warning of what is out there and why you should be careful when connecting to unknown Wi-Fi and to use a VPN whenever you can.


So is there anything else you can do. Yes, there is one more thing I thought of in this analysis that I don't think it would be complete without and that is - location. Yes, what is the real point of detecting a nefarious device that is connecting if you are then not able to localize yet. Find it? How, it is invisible? Not really. I found another very interesting tool for android phones. This doesn't exist for iOS yet, but I hope that is in the works somewhere. This app is called WiGLE WIFI Wardriving. With this app using the phones GPS and maps we are able to do wireless site surveys that show us precisely where a device is based on an SSID or mac address. This can even help you locate Bluetooth devices. So here I wanted to confirm that my device was indeed correctly connected to the Wi-Fi honeypot and the location is correct and I can confirm I'm connected to the right device. This can also be used to find the device by mac address that was initially logged in our first honeypot. So we have also gone a layer deeper with the wireless site surveys and can now not only identify nefarious devices that have connected but we have a way of finding the location of the devices.


Thursday, March 18, 2021

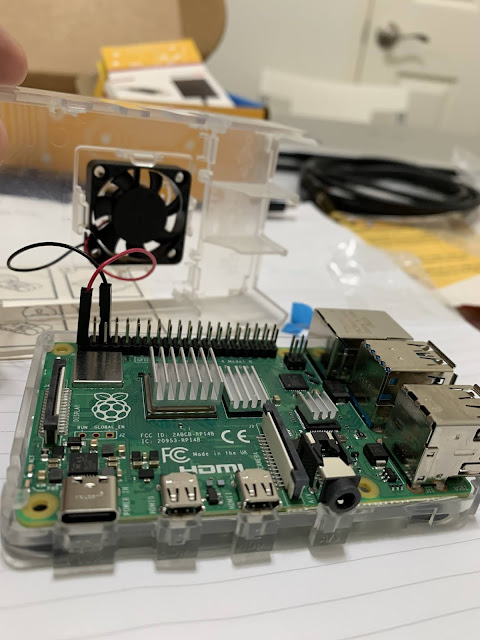
Raspberry Pi WiFi Honeypot 🍯

This was a fun project to work on and build out. I learned a few new interesting tricks along the way. I started with this tutorial from 2013 by Andy Smith. However, a few things have changed with hostapd that I had to figure out through debugging. Also, the configuration of the nginx server as well as dnsmasq were slightly different for me using the new Raspbian Buster for Raspberry Pi 4.  This should save you some time if you follow my trick tips later on in the article that I found by searching through various message boards and googling error messages as I did debugging to get this working properly.

I have gone over setting up nginx servers in previous articles so if you need help with getting started these may be helpful.

So first things first. I started with a canakit and assembled the raspberry pi with the appropriate heat sinks and a little fan set to a standard speed. The speed is adjusted by how you install the wiring. If you haven't done this before you can follow the manufacturers documentation to get rolling with that.


Assembling the Raspberry Pi
Assembling the Raspberry Pi. Hardware assembly is fun if you like puzzles :).

Next I flashed the micro SD card with Raspbian Buster which is the operating system that will be on this tiny computer. I used a little adapter and balenaEtcher on a mac to flash the micro SD card. This is pretty straight forward so I won't go into the details since there are plenty of easy tutorials to do this part.

Success! The card is flashed and we are ready for the next steps.

At this point I went ahead and added a WiFi dongle that can support running as an access point. Additionally for configuring I went ahead and plugged in a keyboard and mouse with a usb hub so now this is looking very cyberpunk but I promise this will be easy and very efficient as we go along further.


Now I did this project over two separate nights so the additional step here is that you will need to briefly connect this to an ethernet cable to grab a few things. Eventually this is not connected to ethernet so we can have a truly sandboxed wifi honeypot that is not connected to the internet and is merely to log attacker activity and attempted access. I plugged in the ethernet cable and grabbed hostapd, nginx, and dnsmasq.

The honeypot at a high level is a simple but quite interesting concept. We will spin up an access point with hostapd that can be joined from a phone or laptop. Here I called the honeypot network 'decepticonNetwork'. Then with a neat little trick dnsmasq will now redirect all requests to our local nginx server which is serving up the little warning page. Getting hostapd up and running is not as easy as it was before but it is more for security that it does not come unmasked out the box so to speak. Through the command line I ran commands to unmask, enable and start and it finally connected properly to both a laptop and a phone.


Now you can configure the nginx server to do anything you want when the device that illicitly connected to our untrusted network tries to access a webpage. I redirected all web requests to my nginx server using dnsmasq. So now after connecting to 'decepticonNetwork' if I type in any url like somerandomurl.com or blaaaaargh.com my nginx warning page gets served up. 


Also a fun extra here is that now all users who access the WiFi honeypot are now logged in a dnsmasq.log file for later analysis and review. This was a fun learning experience. Obviously this is just the beginning as you can then get a lot more advanced with your logging and blue team analysis and defense. However, this is a great introductory start to the world of WiFi honeypots and cyber defense.

Automated Exploitation of a Bluetooth vulnerability that leads to 0-click code execution

This blog post covers an interesting vulnerability that was just discovered earlier this year and an open source free tool that was created ...